Choosing a Hinge Handle in 2026 is not just a finish decision. It affects how a door feels, clears nearby surfaces, and holds up to daily use. For this introduction, architectural-hardware specialist Alex Morgan is an illustrative expert voice, not a sourced real person. The editorial line attributed to that voice is: “A good handle fits the hand, the door, and the space around it.” That is the right place to begin.
Check the door’s thickness, hinge position, opening direction, and available clearance before comparing styles. A handle that looks elegant in a product photo may strike a wall or feel awkward beside a cabinet. Measure carefully. Then consider grip shape, projection, material, finish, and the room’s humidity. A brushed finish can soften fingerprints; a rounded edge may feel kinder during repeated use. Small details matter.
This guide will help you compare designs, materials, compatibility, installation needs, and value without treating trends as guarantees. Product specifications vary, so confirm measurements with the manufacturer and test a sample when possible. A showroom handle can feel different from one fitted to a real door. I would not skip that check. The choice may still involve compromise: the most striking option is not always the most comfortable, and the easiest grip may not suit every interior. Use the sections ahead to make a practical, informed choice for your door and daily routine.
How to Choose the Right Hinge Handle in 2026
Understand Hinge Handle Types and Their Intended Uses
A door’s hinge determines how it moves; its handle determines how people open it. Butt hinges suit many standard interior doors, while concealed hinges keep cabinet faces visually clean. Continuous hinges run along much of a door’s height, helping distribute load on frequently used or heavier doors. Pivot hinges support doors that rotate around points near the top and bottom, but they need compatible framing and careful fitting. Each type has limits.
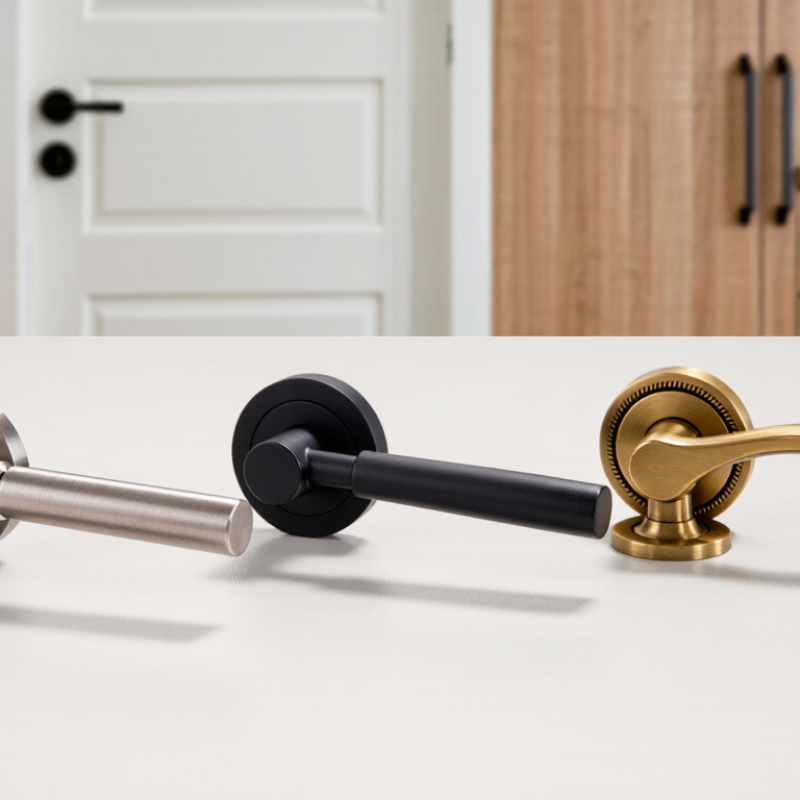
Handle shape should match the door and the way it is used. A lever is often easier to operate with an elbow when hands are full. A knob takes less space, though it can be harder to grip. Cabinet pulls provide a clear, direct grip, while recessed pulls avoid protruding into narrow walkways. Check door weight, swing clearance, material, and expected use before choosing. Small details matter.
Fit matters too. A sturdy hinge cannot correct a poorly aligned door, and a comfortable handle may still catch on nearby trim. I’d measure the opening and test the swing before ordering hardware. That step is easy to skip. It is also where plans sometimes go wrong. Follow the hardware maker’s load and installation specifications, and ask a qualified installer when the door’s weight or construction is uncertain.
How to Choose the Right Hinge Handle in 2026: Understand Hinge Types and Their Intended Uses
This chart matches common hinge types to typical primary applications. A value of 1 indicates a typical use; 0 indicates it is not a primary use. Always check the hinge’s load rating, dimensions, materials, and installation requirements for your project.
A handle should suit the door’s size, weight, and daily use—not just its appearance. On a heavy room door, a small, shallow grip can feel awkward, especially when hands are full. Check the door thickness and the handle’s fixing dimensions before ordering. Measure twice. For a cabinet, consider whether the door is inset or sits over the frame; that changes the space available for fingers and hardware.
Hinge position matters, too. Open the door fully and note how close its edge comes to a wall, neighboring cabinet, or appliance. A long pull may catch or hit nearby surfaces. Check the swing. On paired doors, keep handle placement consistent while allowing enough clearance between the doors. Hinges that limit the opening angle can make a bulky handle uncomfortable to reach, even if it looks right when the door is closed.
Match the handle’s projection and shape to the hinge setup, then test the layout with paper templates or removable tape. This small step can reveal a collision before drilling. Choose fixings suited to the door material and thickness, and avoid overtightening screws into soft cabinet panels. Measurements are useful, but they do not capture every hand size or movement. A handle that seems ideal on a sample may feel slightly wrong in daily use, so check its grip before fitting several.
| Application | Door or Cabinet Type | Hinge Setup | Suitable Handle | Useful Size Guide | Fit and Clearance Check | Practical Material Choice |
|---|---|---|---|---|---|---|
| Interior room door | Standard hinged door, typically 35–45 mm thick | Butt hinges or concealed door hinges; confirm handing and swing direction | Lever handle on a rose or backplate | Choose a spindle and fixing arrangement compatible with the door thickness and lock or latch | Check that the lever clears the frame, wall, and nearby trim throughout its full movement | Stainless steel or durable plated metal for frequently used doors |
| Bathroom or utility door | Interior door with a privacy or passage latch | Butt hinges, pivot hinges, or concealed hinges, depending on the door design | Lever handle with a compatible privacy or passage function | Match the handle set to the lock, latch, spindle, and existing bore preparation | Verify the handle does not hit a wall, towel rail, or adjacent door when opened | Corrosion-resistant metal is a practical choice in humid rooms |
| Full-overlay cabinet door | Door covers most of the cabinet face frame or side panel | Concealed cup hinges, commonly available in 35 mm cup formats; overlay varies by hinge and cabinet | Cabinet pull or knob mounted away from the hinge edge | Common pull center-to-center sizes include 96, 128, and 160 mm; confirm against the door width and drilling pattern | Keep the handle clear of neighboring doors and drawers; test the opening arc before drilling | Stainless steel, aluminum, or solid metal suited to the expected use |
| Inset cabinet door | Door sits within the cabinet opening rather than covering its edges | Inset-compatible concealed hinges or surface-mounted butt hinges | Small knob, compact pull, or edge pull | Select a projection that allows a comfortable grip without extending excessively beyond the cabinet face | Check the door gap and hinge-side clearance; a projecting handle must not obstruct the frame or an adjacent door | Solid metal or a well-finished metal alloy for repeated contact |
| Narrow drawer front or slim cabinet door | Limited front width or a minimal, handle-free appearance | Hinges remain selected for the door overlay, weight, and opening angle | Edge pull, recessed pull, or compact knob | Measure the available edge or recess depth; use the pull’s installation template | Confirm finger access and ensure the pull does not interfere with the hinge arm or adjacent front | Metal edge pulls are generally durable; recessed designs should suit the panel thickness |
| Heavy or wide cabinet door | Large, thick, or frequently used door | Hinges rated for the door’s dimensions and weight; hinge quantity and placement depend on the hinge maker’s guidance | Long pull or sturdy handle with secure through-bolting where appropriate | Choose a grip length and mounting pattern that can be comfortably reached on the door | Check handle projection against nearby walls and verify fasteners suit the door thickness | Robust metal construction with fasteners appropriate to the door material |
| Exterior hinged door | Entry or other weather-exposed door | Exterior-rated butt or security hinges, selected for the door and frame | Exterior-rated lever or grip set compatible with the lock and door preparation | Match the backset, fixing centers, spindle, and door thickness to the existing lock or new hardware | Check weather exposure, clearance to the frame, and the door’s full swing before installation | Use finishes and materials rated for the local exposure; stainless steel is often suitable for corrosive environments |
Measurement note: Handle dimensions and hinge compatibility vary by product and installation. Confirm the door thickness, hinge type, opening direction, fixing pattern, and manufacturer’s template before drilling or ordering.
Start with the door, not the style. Measure its thickness, the handle’s overall length, and the distance between fixing holes. Check the spindle size and the existing latch opening, too. A handle can look right online yet sit awkwardly on a narrow cabinet door. Small details matter. If replacing an old handle, keep it nearby while comparing measurements; memory is not a reliable measuring tool. Allow enough clearance for fingers and nearby walls or drawers.
Material affects feel and upkeep. Stainless steel suits busy areas, while brass can develop a warmer look over time; coated alloys may offer more finish choices, but scratches can reveal the base material. Match the finish to nearby hinges, though exact color matching is not always possible under different lighting. Check mounting requirements before buying: some handles use through-bolts, while others need screws into the door face. Confirm the supplied fixings suit the door’s thickness and material. One easy detail to misjudge is screw length. Too short can leave a loose handle; too long may not seat properly. Recheck the measurements before drilling.
A good handle should feel natural in your hand and move without a jerk. Try opening the door with wet hands and while carrying a light bag. A small, slippery knob may be awkward; a lever can be easier to operate, though it may catch on clothing. The CDC estimates that about one in four U.S. adults aged 65 and older falls each year. That figure does not measure handle-related falls, but it is a useful reminder to consider safe, easy movement at home.
For accessibility, the 2010 ADA Standards say operable parts should work with one hand, without tight grasping, pinching, or wrist twisting; the operating force limit is 5 pounds. These requirements apply in specific settings, so check which rules cover your project. For durability, compare the door’s weight and use with hinge specifications, and look for testing against ANSI/BHMA A156.1. Smooth movement matters. A strong handle cannot compensate for a poorly matched hinge.
Tips: Test the handle at the installed height, check that the door clears nearby walls, and listen for rubbing. Ask about finish wear and cycle testing. One detail is easy to miss: a handle can feel comfortable in a showroom but awkward after repeated use at home.
Before choosing a hinge handle, check how it attaches to the door and hinge. Compare the door thickness, hinge type, screw-hole spacing, and opening direction with the product’s fitting guide. A handle that looks close may still sit crooked or interfere with the frame. Small gaps matter. Check that it clears nearby trim and does not obstruct the door’s full swing.
Installation needs depend on the existing hardware and the door material. Measure twice, including the distance from the hinge to the handle position, and confirm that the mounting screws are long enough without reaching through the door. For a replacement, test the fit before tightening everything. Keep screws snug, not forced; overtightening can damage the threads or finish. If the door is heavy or the mounting points are worn, ask a qualified installer to assess the setup. A neat fit is not always a strong fit.
Long-term care is simple, but easy to forget. Wipe the handle with a soft cloth and mild soapy water, then dry it to prevent residue around joints. Avoid abrasive pads that can scratch the surface. Check for loose screws and unusual movement during routine cleaning. Lubricate moving parts only when the manufacturer recommends it, since some finishes and hinge designs need different care. A little play may be normal; persistent wobbling deserves attention.